
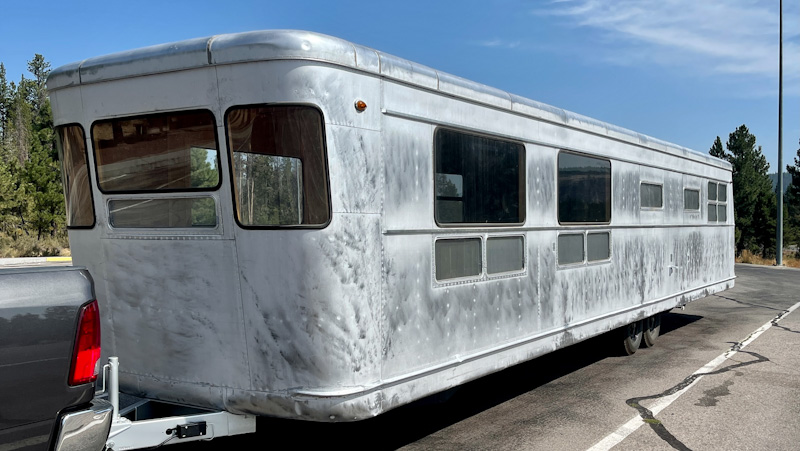
Acrylic, commonly called plexiglass, was originally used in the front windows of the Spartan observation lounge. After 60–70 years of service, these acrylic windows are often cracked, scratched, or even missing, and need to be replaced. Vintage Campers offers replacement windows for all Spartans built from 1947–1958, excluding the 1946 Manor models.
First, remove the old acrylic (plexiglass) window and rubber gasket. The replacement windows are intentionally oversized and will need to be trimmed to fit your particular Spartan. Early on, we found that window openings can vary by as much as 5/16 inch even among the same model Spartans, making a one-size-fits-all window impossible. Our windows are wrapped with a protective paper coating on both sides to prevent scratching during cutting and fitting.
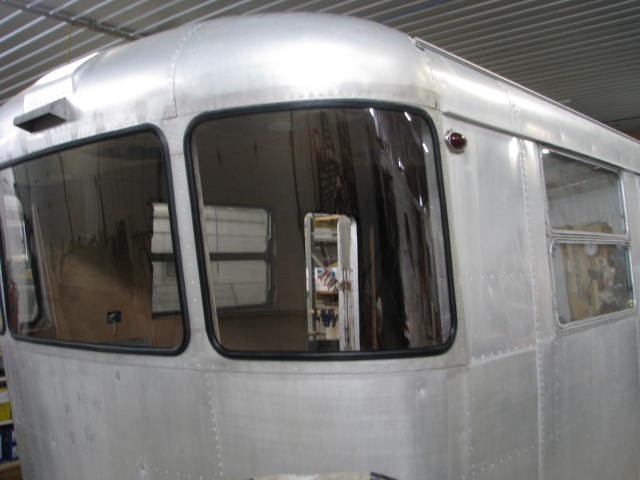
Our custom-built windows are made from UV-stabilized polycarbonate. They are much better and stronger than the original acrylic windows. They will not crack as easily as acrylic ones will, even if a rock is thrown up while traveling. Polycarbonate is the same material used for bulletproof glass.
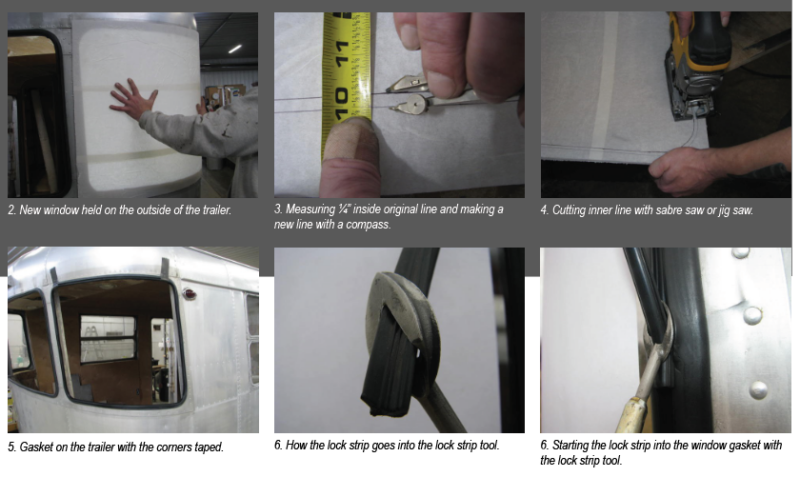
Hold the new window against the outside of the trailer so it matches the radius of the body. From inside the trailer, trace the entire perimeter of the window opening onto the protective paper using a pen or fine felt-tip marker. This is a two-person job: one person holds the window in place outside while the other traces the opening from inside. Make sure the window is centered and tight against the aluminum so you get a precise line on the best portion of the panel. We do not recommend using the old window as a template because it may have shrunk over time.
The rubber gasket we sell allows for a 1/4-inch gap between the window and the aluminum skin cutout on the trailer. If you are using our gasket, the window must be cut 1/4 inch smaller than the line you just traced. This can be done with a compass or by measuring 1/4 inch inside the original line and drawing a new cutting line. If you are using a different rubber gasket, measure it first to determine how much smaller the window needs to be cut.
Triple-check all measurements before cutting. It may also be helpful to compare the lines drawn on the new window with the old window you removed. They may not match exactly, but they should be close. In some cases, original windows have shrunk slightly and are smaller than the opening.
Use a sabre saw or band saw to cut the window to size. Running the saw at a lower speed will help prevent melting the polycarbonate while cutting. It’s a good idea to make a few test cuts on the outer edges before cutting the final line. Try to cut as accurately as possible, but if anything, err on the side of leaving the window slightly too large rather than too small. Small amounts can be trimmed with a belt sander if needed. If the window is cut too small, it cannot be corrected. Once the window is cut to the correct size, deburr all edges with a razor blade or sandpaper to prevent damage to the seal during installation. Then peel back the protective paper coating about 1/2 inch around the outside edges on both sides of the window.
Install the rubber seal onto the window opening by placing the narrow slot of the gasket over the aluminum skin. Make sure the channel for the lock strip faces outward. Cut the seal about 1/4 inch longer than needed (with a straight cut), then press and slide the end over the starting point to create a tight seam that is nearly invisible. We usually position the seam toward the inside edge of the window opening, closer to the center window. You may need to use duct tape at the corners to hold the gasket in place during installation. We suggest using our oversized gasket and lock strip for the corner windows and the original-size gasket and lock strip for the center window.
Spray silicone lubricant into the rubber channel where the window will be installed. Begin installing the window into the gasket at one of the lower corners and work it into the rubber using a plastic putty knife. The corners can be difficult to seat fully, so take your time. Be careful, as the polycarbonate surface scratches easily.
Once the window is fully seated in the rubber gasket, you can install the rubber lock strip. We typically start installing the lock strip at the point opposite (180 degrees from) where the rubber seal seam begins. A lock strip installation tool, such as part # COT001, is required. Using silicone spray or a mild soapy solution will make installation easier. Feed the lock strip into the channel while pushing the tool forward, or gently rock the tool back and forth as you push.
Continue installing the lock strip all the way around the window. As you approach the end, cut the lock strip about 1/4 inch longer than needed with a straight cut and press it into place to form a tight seam. We recommend filling any small gaps where the seal ends meet with black 100% silicone.
Once the window is fully installed with the gasket and lock strip, remove the protective paper coating immediately. If the protective coating is left on too long, it can become very difficult to remove and may damage the window surface.
Polycarbonate scratches easily and has to be cleaned with a special cleaner called Novus 1 and a soft cleaning cloth. PAPER TOWELS, WINDEX, or AMMONIA-BASED CLEANERS should NEVER be used to clean polycarbonate windows.
Good Advice

When is a vintage RV trailer considered vintage?
This article may help: https://vintagecampertrailers.com/is-my-trailer-vintage/