
By Tim Haworth
A few years ago I decided to replace the electric brakes on our 1950 Aljoa Sportsman. I made a phone call to the local brake shop and discovered I could purchase a new set for less than $150. if they could match my old set. They were pretty confident that they could, so I dismantled one wheel and took the brake assembly in for them to look at. As it turns out, they had a pair in stock, so I was literally a happy camper. Additionally, the new brake set had an adjustable feature.
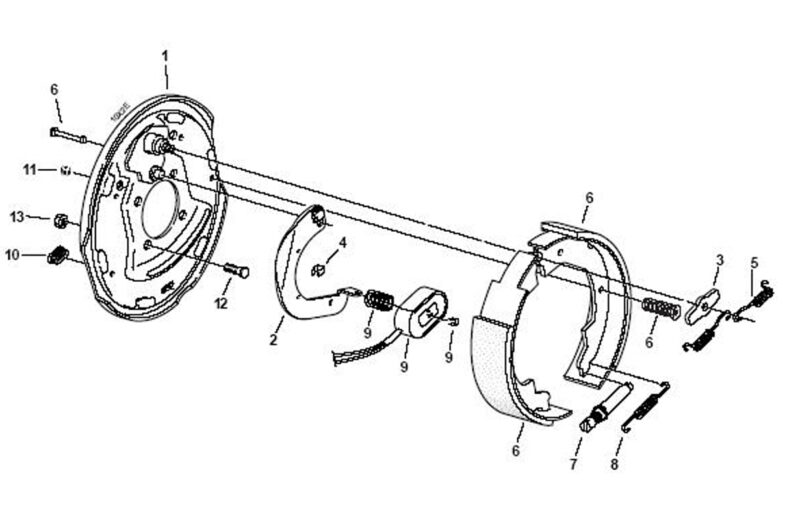
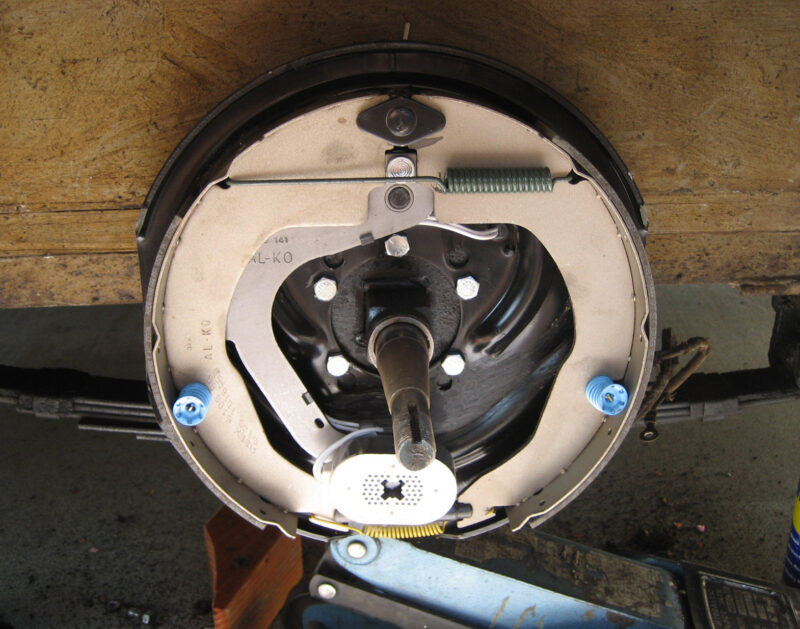
Electric trailer brakes work much the same as drum brakes on cars and trucks. There are two brake shoes per wheel. These are fastened to the brake backing plate with their friction surfaces facing away from each other to form a circle on the inside of the brake drum. The assembly includes an electromagnetic pad designed to come into contact with the disc surface of the brake drum. By adjusting the current through the brake controller, you can adjust the braking action to fit the need. Electric brakes are really quite a simple design. The electromagnet is activated when you put on the brakes. It grabs onto the armature of the drum and thus expands the brake pads outward. Brake assemblies are handed. They must be installed so that they work in concert with the wheel rotation. They will be marked left and right. Left is the driver’s side. The two wires are signal and ground. It does not matter which one you hook to ground, but be consistent for both sides. I recommend that you purchase enough new wire to connect the two brake systems together and to run the lead up to the trailer hitch. I purchased 20’ of sheathed two-strand wire for our 12’ trailer.
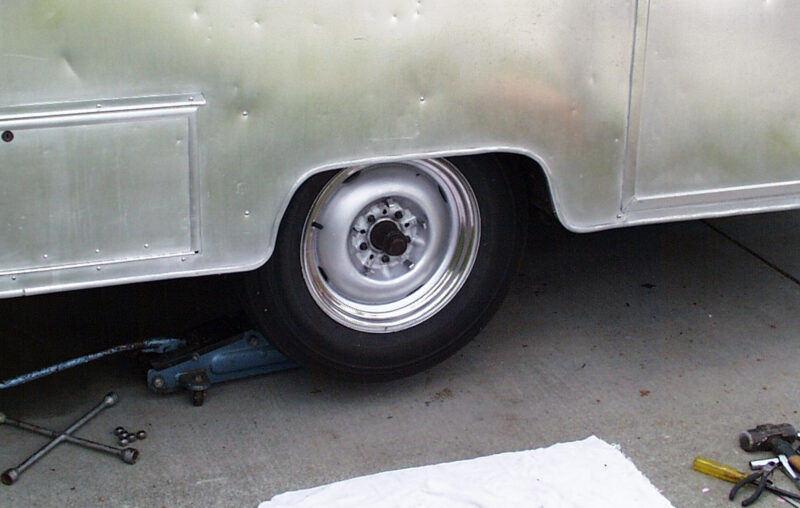
First, get under your trailer with a flashlight and check the backing plate flange for bolts. You will see four or five nuts on the inside face of the mounting flange. If you see no bolts, it is likely that your brake assembly is a welded unit and cannot be replaced without replacing the axle as well. If your brake assemblies are bolted on to the axle flange, then the brakes can probably be replaced. What follows is a brief guide to help you do it yourself. To start, you’ll need a floor jack or bottle jack, a pair of pliers, end wrenches, a socket and ratchet set, a torque wrench and a breaker bar if your bolts are rusted on. A penetrating lubricant will be helpful in loosening tight bolts. As you proceed with this repair, it is wise to take photographs so that you can reference them during re-assembly.
Jack up the trailer. Be sure to block the other wheel or hitch the trailer to your tow vehicle to prevent it from moving. Remove the wheel and then the dust cap from the hub.
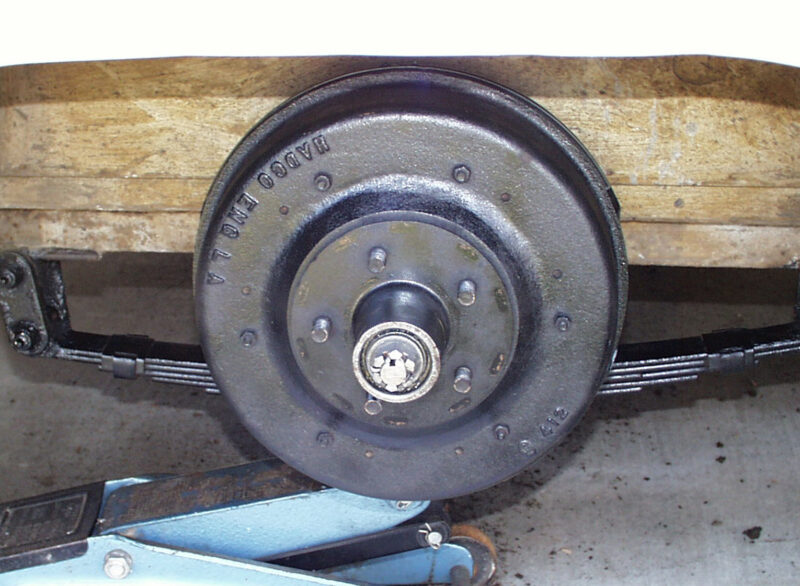
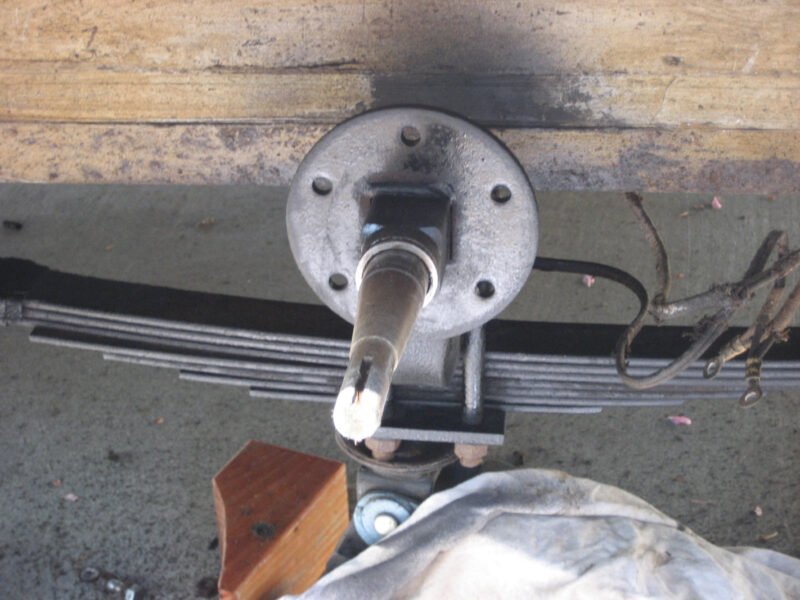
Looking at the hub you will see a large nut with a cotter pin on the end of the spindle. This holds the brake drum and the bearings onto the axle. Make a mental note of how many spindle threads are showing from the nut. This will be a good reference when you put it back together. Remove the cotter pin and back off the nut. Now remove the retainer washer and the outer wheel bearing. It should slide off in your now greasy hand. Set these aside on a clean shop rag. Remove the brake drum and the inner bearing and shield. Put the inner bearing assembly with the other parts on the clean cloth. Keep them in the same order for re-installation. You’re now looking at the brake assembly. Four or five bolts hold it onto the axle flange. These are through bolts, so there are nuts and washers on the inner side of the flange. Determine the wrench sizes you’ll need and remove the bolts. Disconnect the two wires and the backing plate and brake assembly is off the trailer.
Click here to watch a video we did for Boot Camp on vintage trailer brake replacement.
Take the brake assembly, the hub and the bearings to your brake shop to see if they can provide a matching set. Have them look at the bearings to see if you need to replace them. You may need to have the drums turned as well. Before you leave the shop, ask for a cup of axle grease so you can repack your bearings when you re-install them. The brake assemblies come as a complete unit. You just have to install them onto the axle flange, tightening the bolts in an alternating pattern. The recommended torque is 45-70 pounds for a 3500 lb. axle. Ask your brake supplier for the torque requirements for your assembly.
Once you have installed the new brake assembly, you can repack and install the inner bearings, the wheel hub, the outer bearings and the retainer washer. Install the nut and tighten it down until the wheel hub will not turn. Back the nut off about one turn. The wheel hub should rotate smoothly with no end-play. It is better to have the wheel loose rather than tight. Insert the cotter pin and bend the ends back. Install the dust cap and the wheel. Repeat the process for the other side and install the new wiring. Your final step will be to take the trailer on a test run to check the brakes and set the controller.
Originally published in issue 23 of the Vintage Camper Trailers Magazine.